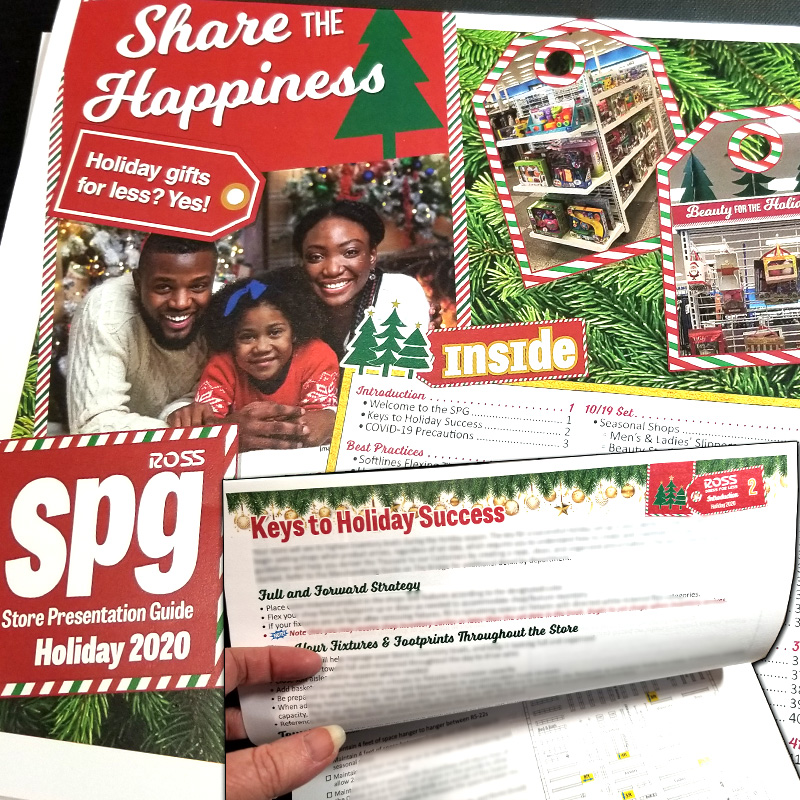
Store Presentation Guide and Collateral
The Store Presentation Guide (SPG) is a semi-monthly publication sent out to all the stores in the Ross chain that contains retail merchandising guidance, maps, and feature direction. For six years, I was responsible for all aspects of the budgeting, planning, production, and distribution of the SPG, either directly or by coordinating with partners in other departments to ensure it was completed. It encompassed both printed and digital versions for distribution.
Project Management
I created a process drawn from my experience with agile programming practices to manage multiple overlapping books at the same time at different stages of progress. Because the lead time was so long, there would usually be two to four books in progress at any given moment, plus I supported stores in implementation after publication.
Collaborating with Buyers and Corporate Stakeholders
Content needed to be collected and go through several approval checkpoints with a varying number of stakeholders that frequently hovered around 20 people. I was also responsible for ensuring that content and changes from different stakeholders didn’t conflict with each other.
Theme/Typography
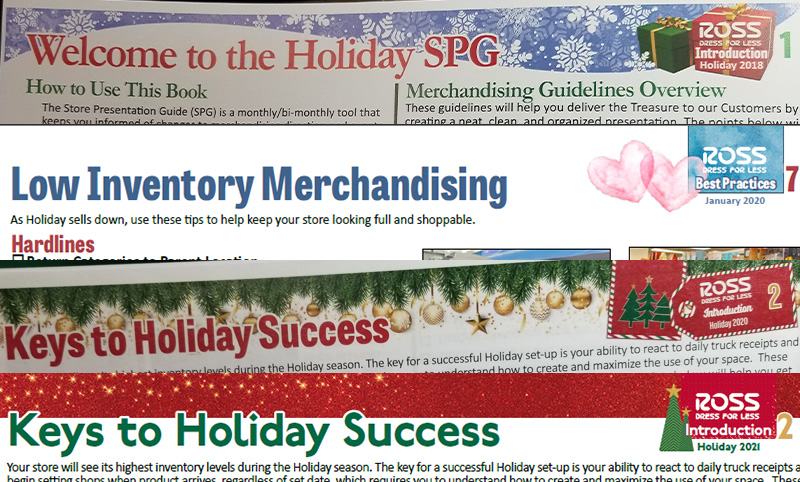
I broke the publication down into modular templates in InDesign and Illustrator and used the Styles system in InDesign so I could update colors and typography and templates in just one place. The goal was to make the fewest number of touches possible for any change. Reusing modular elements also created greater consistency across collateral.
This allowed me to focus more on creating fun themes for each book that matched the signage and seasonal products. I aimed to match the feel of the book to how the store should also feel during the time it covered. The four themes shown in the image here are examples of this in action. These themes were created once, in a template, and propagated to the rest of the book automatically.
Creating Maps
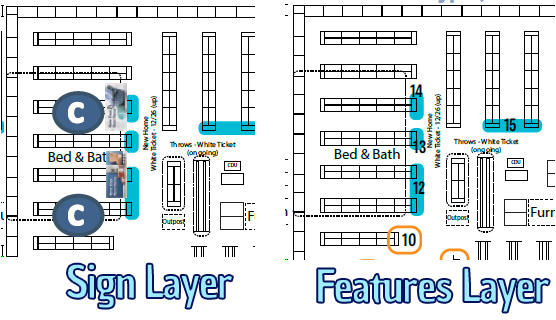
As with the modular templates, I reduced the maps down to one base map for each store overview footprint. InDesign allows you to place Illustrator files with layers turned on or off regardless of whether or not that layer is visible in Illustrator. So if you put each type of information on its own layer, you can keep all of the map information in one file, with the appropriate layers hidden or shown for each placed location of it. For example, in the image at left, signage can be shown only on the maps in the signage section, and hidden in other locations.
Drafting feature guidance and instructional content
I wrote most of the copy for each book. I approached this with a focus on the end user, not the corporate stakeholders. The average users had a high probability of having English as their second language, or of being a high school or college student, so I kept the language simple, and weeded out corporatisms as much as possible. For example, stakeholders would often try to use the word “utilize” in the content, when “use” is much more ESL-friendly.
I kept formatting as consistent as possible not just within sections, but with all direction, to make it easier for users to refer to while stocking or setting products without deep study.
Additionally, when there was room in the book, I created “Best Practices” tutorial and explanatory articles to teach associates not just how to merchandise products, but why.
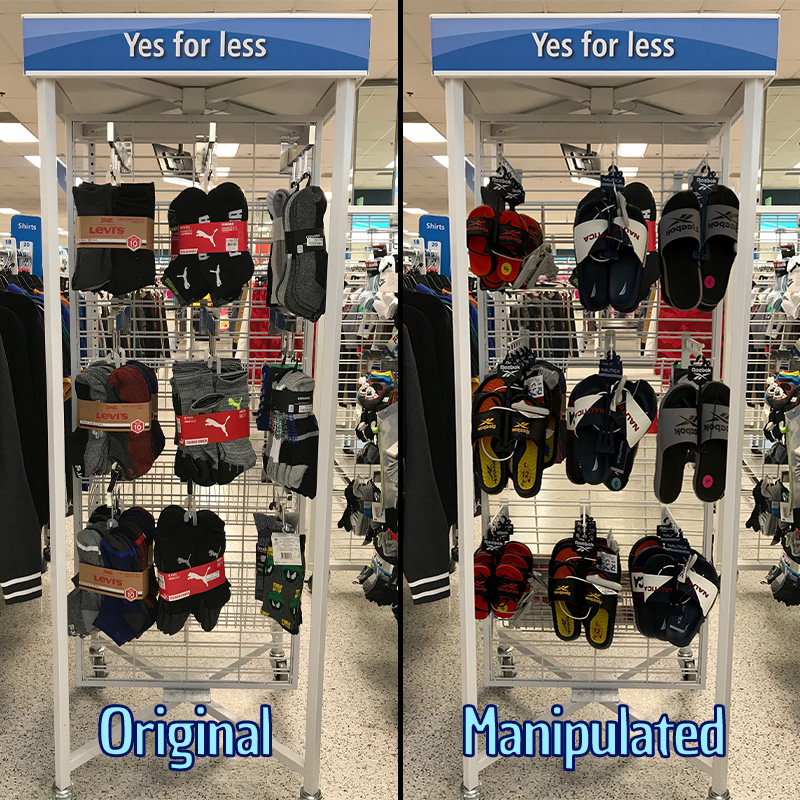
Photo Manipulation
Images in the publication needed to match the guidance being given, but frequently the publication was being produced so far ahead of time that the correct product wasn’t available in the necessary quantities to stock a fixture and just take a photo, nor was signage available ahead of time. When that happened, we would take an image of the correct fixture, and I would use a combination of other images of the correct products and signage to create photo-realistic mockups of the final fixture’s appearance.
Here you can see the product of this process. In the first set of photos, I started with the photo of socks, for the correct fixture and placement. Then I used used photoshop techniques to remove the socks and the metal hooks they were hanging from. Had signage needed a change, I would have done that next. When I was working on this photo, only a few pair of flip flops could be found in a local store, not nearly enough to fill a fixture, so we took a series of images of them at different levels on the corrected hooks, on a different fixture at a different location, and I composited them onto the fixture individually. Note that no AI is used in this process.
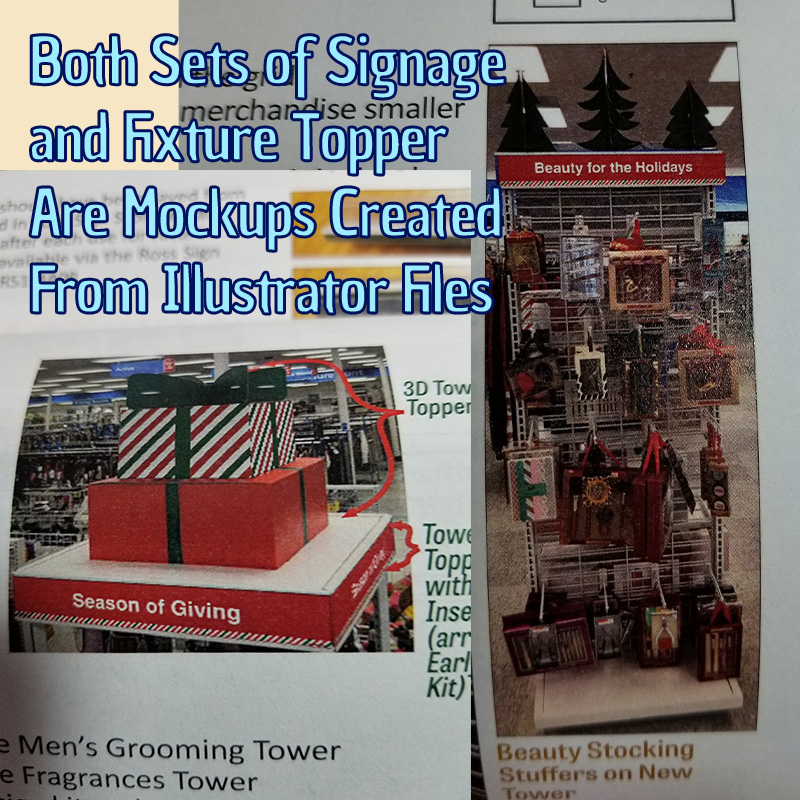
In the second photo, I created a photo-realistic mockup of the signage on top of the fixtures. The original photo had different signs and I took the final print files from the vendor and composited them to create a three dimensional representation of how they would look once printed and installed.
Collateral
My team developed a streamlined reference tool that was hung from stock carts to assist in daily stocking and recovering. This was a condensed at-a-glance version of the information found in each book. I also produced a separate version of this for store managers that included a checklist and calendar to make it easier for them to ensure all the changes were made in their store.
Prepress/Press
I worked with in-house print partners to ensure every book and all collateral were produced in the most labor-efficient and cost-effective way, and that all files met the required specifications for proper printing.
Distribution
Each book was distributed physically via carrier and posted to a digital intranet. I worked with inhouse partners to ensure timely delivery of the physical copy and to deliver digital-friendly versions of the files
Store Support
Once books were delivered, I was the primary point of contact when stores had questions about execution or products. They would contact me via email or phone and I was responsible for answering them in a timely fashion. If I didn’t know the answer myself, that included tracking down corporate partners who did know and then translating their answer into the same simplified non-jargon language that we used in the written direction.
Budgeting/Accounting
I was responsible for creating and maintaining the yearly budget and participating in/presenting at all associated meetings with Finance. I generated several tools to help calculate the prospective budget based on previous years’ numbers and expected new store additions over the coming year. Additionally then I was also responsible for staying under budget and participating in all Finance meeting relating to accruals. I came in under budget overall every year, even as store count (and therefore print numbers) grew.
Leave a Reply